October 28, 2010

Costume Contest Winner!


Halloween is the perfect time for a crafty gal like myself! We have NEVER bought a store costume, I have always scrounged up something unique with supplies here at the house. Now that the boys are older they tell me what they would like to be! Collin is obviously stuck in the "box" phase. This year he went to the dance as a Tic Tac container!

 I would just like to add how hard it was to find plastic Easter eggs in October! I had a huge rummage last spring and got rid of most of mine...The Tic Tacs are eggs covered in green duck tape. The plastic container is a storage container we got at Wally World.

I removed the lid and duck taped a piece of poster board to the container. I left about 4" from the bottom to leave room for the eggs. I also cut it about 3" too short from the top so I could fit in the eggs...I mean Tic Tacs! White duck tape was used to make the top and the opening. I punched 4 holes and tied 1/12" elastic trim to hold it to his body. They criss cross in the back so Collin could easily slip in and out! As always, the costume won FIRST PLACE!!

On another note, here are some pics of my newest nephew.
He is also in costume. 
He is a pumpkin. 
I mean in a pumpkin!!
Doesn't the look on his face say it all!!! I laughed so hard I was crying...
SOOO CUTE!

October 27, 2010

Halloween decor


Hello all,
I can't believe it is almost Halloween! Didn't school just start!?! We are having a terrible wind storm outside...Garbage cans are rolling down the street and I saw an overturned porta-potty! GROSS! I wonder who gets to pick that up?

Here are a few scary pics...We have a haunted yard set up and people walk through it...We have had hundreds of scared "victims"...Some have even turned back and didn't finish the maze. Awesome. 
I love Halloween.
BOOOO!
This is the entrance, if you dare...

Spider webs and skeletons are a must for any haunted home!

Don't you just love the leaves stuck in the webs?

Here we have the crazed butcher, (my father) and the evil witch, ( my mother)!

And of course, some zombies hiding in a corner....Can't tell which ones they are...
Happy Haunting!

October 25, 2010

For the coffee lovers!


Happy Monday, my fellow crafters, followers, friends and family! Cute stuff on the way!! 

Last day for business stuff: Here are my 3 best tips for a good show!
  1. Always bring enough merchandise! I try to make a dozen of everything I bring...
  2. Make sure EVERYTHING is priced or signs are posted all over the place! Nothing worse than trying to answer 3 people with different items and costs...
  3. Have enough change! Most people shop with $20 bills but there are some who come to shows with $50s.
I will update the show season as it goes along! 


OK, I almost always shop in bulk for my supplies. The items are normally cheaper BUT my house is bursting with them...But in my defense, I have dabbled in many of crafts. I have florals, wood and now paper crafting stuff! I am trying to lighten the load by using up some of them! 
I did the tea bag stocking stuffers last week and I felt I needed something for those coffee drinkers! I do not drink coffee, I don't like the smell of it...weird, I know! 

This nifty gift idea holds 2 flavored ground coffee pouches. The snowflakes are chipboard and painted with acrylic paints. The paper came from a Christmas stack at JoAnns and the large brown button is one of MY hand dyed beauties!
The button used to be pale yellow!! I used glitter to make the largest snowflake sparkle.
The sentiment was from a CTMH stamp set. The frame is a PTI stamp and has a matching die! I have also made some up as kits and packaged them, without the coffee of course, to sell at my upcoming fairs.
I am going to change the sentiment stamp and papers and fill these with candy! Imagine this with Halloween papers, chipboard pumpkins, and filled with candy corn!! OR Christmas papers and filled with candy cane sticks! AND since I bought a CASE of these acrylic boxes I will have plenty to work with! These will go up on my ETSY store soon!

October 22, 2010

Gingerbread Man


Business stuff: Our display includes wooden shelving units, plastic tables and plenty of baskets and wooden crates. We only use black table coverings because it really makes your product stand out!
We also wear matching, monogrammed shirts with black aprons. It was fairly easy to switch our display from selling wood crafts to selling paper crafts. We just needed to purchase 4" metal hooks and clear front shelves to hold our pre-made albums. 
All of our items are stored in hanging cello bags. And when we run out of metal hooks we just use the good 'ol clothespins! They are strong enough to hold up the albums and can spread wide enough to fit on the slats. On to the crafting...
  
 Remember the post about the gingerbread men I made using the new punch I bought.
Here is the finished product!
Isn't he adorable? Dimensional paint is used for the icing and I did hid eyes with a stylus dipped in paint...He is mounted onto a covered clothespin. Maybe I will clip him to a candle or use him as a fridge magnet OR maybe I will string him and some friends along some red bakers twine to hold our Christmas cards!! We'll see...

October 21, 2010

Stocking Stuffers


Business stuff: To have enough inventory for the fairs we craft/create 9 months of the year! You can't make money if you don't have any stuff left to sell. We bring items ranging in price from $75 to $3. Most people don't plan on spending $250 on a 12 x 12 scrapbook BUT they will pay $75 for a smaller pre-made one. You should also carry smaller, lower ($3-$5) priced items, we call them Stocking Stuffers! We normally locate these near the check out stand and we point them out as customers shop or check out. Sometimes for a large order, we throw some in to say thank you for spending your money in our booth!
Onto the stocking stuffers...
These are little glassine bags filled with Stash green teas. Each bag has 2 tea bags, Chia and raspberry  pomagranete. Perfectly colored individual tea bags-evergreen green and holly berry red! The paper topper is a PTI die called mat stack 4. I simply folded it in half and glued it to the top of the glassine sack.
 The sentiment stamp is from a set I got @ Hobby Lobby. The tea cup stamp (and matching die) is also from PTI. The small buttons are from my button stash and it is threaded with white waxed thread. The wax makes it easier to thread through the small holes, and to 
handle with my sore hands...
I used pop dots to "POP" the tea cup off the topper. Then I tucked the sentiment flag behind.
I think these are soooo cute. Who wouldn't appreciate this little bit of love given to them?...

October 20, 2010

Custom Color Buttons-done by you!


Business stuff  first: When we first started doing craft fairs our product was personalized wood signs and ornaments. We didn't have to worry about great packaging because it was wood and sealed for the outdoors! About 8 years ago we shifted to paper crafts, mainly personalized scrapbooks, mini scrapbooks, and kits. Some shows we do are outside and paper and HUMIDITY do not mix.
         So we hunted for sealed packaging but clear so the albums show thru...Clear cello bags are the way to go. Most of our packaging supplies are bought at U-Line. 
They sell boxes, clear bags, glassine bags and more!
Here is ONE of my containers holding the bags. (I have 3)
Another source for clear bags is Cello bags.

Now, onto some real crafting and cooking?!?

 
 I love Buttons!! The different sizes and plastics and colors....But sometimes you need just the right shade of a certain color. I have the answer! (The first time I did this was purely by accident!I had borrowed a friends red blouse and when I washed it, the detergent left a stain!! I was horrified! I knew about RIT dye because of tie-dying and I hoped it would work. It covered the stain but also colored the white plastic buttons red! She never knew anything had happened to her shirt even when I fessed up to the mistake)
AH HAAA! If  a washing machine can do that so can I. On the stove! Here is the scoop...

I use liquid RIT dye.
  1. Pour the desired amount (I never measure) maybe 3 tablespoons and 2 cups of water in a pot
     This pot should be for CRAFTS only, not for food cooking later!
  2.  Add the buttons, the water should cover the buttons completely.
  3. Cook on low/med heat, stirring as it heats up. It is the heat that colors the buttons and it happens fast so watch the color. There is also an odor so please use a fan or open a window or something... Takes maybe 5-7 minutes!
  4. Rinse newly colored buttons until water runs clear
  5. I then put them in a large soccer sock, tie the end and put them in the dryer on low heat. I am not a patient person, but you can let them air dry or even sun dry.
That is it! Super simple really. The hardest part is finding light colored buttons. You can also visit the RIT dye website for more ideas. They even have a color mixing chart...very helpful!
Have fun cooking up some buttons!

October 19, 2010

Wedding Albums


Business Stuff: My mother and I have been doing craft fairs for the past 15 years. It is my main source of income and we take it very seriously. We concentrate on quality products, good packaging AND a snazzy display! We also accept credit cards which brings in WAY more money!! Some shows we do everyone accepts credit!...Just some info for you! 
Onto the crafts...

Here are two more samples of pre-made albums. They measure 6" x 18" when opened fully and only use 1 sheet of 12" x 12" cardstock to make!
This one is for the more traditional bride with colors of black, creme, and ivory.
This color combination is the most popular! It really goes with anything...

I try to keep the pages simple to let their pictures really stand out! For the outgoing bride I make...

These albums has lighter colors including pink, blue, silver and white.
I include a large paper clip on most of my albums! I just think they are the neatest thing...
LOVE this paper, and I am not even a girlie girl! 
Mostly tomboy!
And I gave birth to 4 boys...go figure!

October 16, 2010

Conference for Cross Country


Soccer is finally over, YAY, and so is cross country...boo! Collin was seeded 5th and
ran a great race!
He finished 2nd!! Whooo Hooo!! He worked so hard this season.
(In spite of having terrible coaches.)
He runs like the wind!!
While waiting for the meet to start I, noticed some pretty cool things..
The colors of nature are absolutely amazing...and

We are surrounded by creatures...just take the time to look. The top pic has a full grown frog with only his eyes and mouth sticking out.  Can you find him? The bottom pic shows smaller, lighter frogs catching some rays on top of the algea or moss or lichen or whatever?!? I had to be very quiet and zoom in all the way to catch them above the water. 
Go for a walk outside and see what you can find!

October 15, 2010

TGIF


This week has gone by sooo fast! So many things to do! I will post pictures later
for the project I have been working on!

October 10, 2010

Happy Birthday To Me!


Yes, today is my b-day! I would like to say I had a huge party decorated to the max...but I did not! Spent the day at home, (beautiful weather) with my family.
Just perfect!!! 
Here is a past picture of me and the hubby!
Enjoy the day!

October 6, 2010

Test Tube Goodies!


Since most of my craft fairs are held at schools, I always try to do a few "home team" crafts. My next show is home to the Fighting Eagles!
I took empty plastic test tubes and filled them with yummy Jelly Bellys and then decorated the outside. How cute and easy is that...Now, I just happen to live 10 minutes from a candy factory, yes a candy factory, where I can buy almost any color of anything I want. I have put Skittles in these tubes, but M&Ms are too big. Oh, and Sixlets & Nerds also fit...
Here are the tubes empty and boring...
Just waiting for some crafty lady to decorate them up! I can't resist making these, 
and they do sell nicely, too!

October 5, 2010

3x3 note cards


I am so energized lately! I LOVE, love, love this time of year! Could it be because my birthday is right around the corner?!? Or maybe it's the cider and crunchy apples covered in caramel...
I have been playing around with a new stamp set I found @ Michaels and 
decided on making cute little note cards.
See, aren't they cute! I like them a latte!! He he he...and I don't even drink coffee! These are 3x3 folded note cards and the tutorial can be found on an earlier post.
I used black ink for the image and copic markers for the colored areas. I used brown, blue and the lightest shade of gray for the cup "shadow".

Super simple to do, really. I will be selling these as a set of 5 on my ETSY store.  They will be packaged in a glassine envelope and a yard of string will be included! I think these would be perfect as a gift! Or imagine a coffee gift certificate with this hand stamped tag on the outside. Just use a hole punch and tie the card to your package using the included string! Very cute, indeed.

October 4, 2010

Fall tags


Edit: These are now in my ETSY store!

We have had a cold snap lately and all I can say is BBRRRRR! We have been scrambling to find gloves and winter hats. It is cold up there in the bleachers...
Anyhow-on to more crafty goodies! I am still on the Marvy punch kick and these tags were inspired by the cooler weather. Our leaves have actually turned colors in two days time...Just beautiful.
Don't you just LOVE these tags!! I do! The stamp set is from PTI and is my all-time favorite (so far...)
The set comes with 3 different wreath images plus berry clusters and tiny flowers. Imagine the possibilities!
I actually have a berry wreath hanging in my dining room.
Here is a close-up of the wreath:
I used brown ink for the twig wreath and black for the sentiment. Burnt orange ink made up the berries and I found it at the dollar bin @ Michaels! 
Here's a tip: To get the various shades of orange you see on the wreath, just stamp your image then rotate the stamp and stamp again, rotate and stamp again! Do not re-ink! The end result gives a dimensional feel to your stamped image.
To finish the tag I inked the edges with brown, like always, and tied a brown satin ribbon to the top. Enjoy!

October 3, 2010

New Etsy Items


I got some new stuff on my Etsy store!  Brightly colored carnival tickets, tags and clothespins. I stained the wooden clothespins for the season, witchy black and pumpkin orange.

My nails are still stained!! Who needs rubber gloves...apparently I do?!? Enjoy!

Karma?


My brain wanders and interesting thoughts pop into my head. I had a post filled with negativity about a frustrating mom and guess what??!! My blog had problems the very next day! WEIRD... So, no more ranting for me...
for a while...
I hope...
And my blogger upload button is working! Joy! I have been creating like mad. My ETSY shop will have new items very soon....stay tuned!
A very positive and thankful blogger-Kathy

October 2, 2010

Congrats NATHAN!


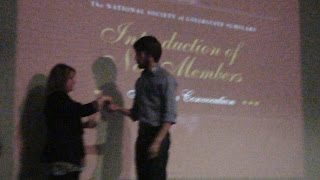
We spent a lovely evening in the Windy City with our #2 son. He was being inducted into the National Society of Collegiate Scholars, or the NSCS for short...
Great job, Nathan!
Hard work always pays off, see, I told you so!
Here is a silly self, picture of myself and the hubby. Harsh lighting I would say!
Sorry for the blurry pic but here is Nathan getting his certificate and pin...I am so 
proud of my little rubber band man!
BTW: I still can't post pics using the new editor on blogger?!? I now have to copy and paste links or upload pics to picasa and go from there! What an inconvenience!! I hope they resolve this soooon!

October 1, 2010

CAN"T POST MY PICTURES!!


I am having major computer problems! I hope tomorrow they will be resolved! UGH...
Related Posts Plugin for WordPress, Blogger...