Showing posts with label gift ideas. Show all posts

April 11, 2011

Baby Picture Frame


Hello friends and family and followers!

Can you believe LIFE got in the way of me blogging about MY life??
It is sooo true...Just got busy and remember,
I am creative, but not very organized!


Here is a project I did as a present for my little sis and her one year old baby.
Happy B-Day little leprechaun!


Each compartment/opening can hold a 4x6 photo.
I decided to decorate only 3 of the openings.
(This way she can put in whatever pics she wants!)


I used a variety of stamps, punches and papers to fill each opening. Lots of embellishments, too! I bought this frame @ Hobby Lobby.


And here is the full view...


And now the final project!


BTW, I think she did a great job coordinating the
picture colors to the frame!

(It really looked way better than I could have imagined!)
Enjoy!

December 23, 2010

Merry Christmas...Almost!


Welcome my blog followers,
I hope you are all snug as a bug! It is quite blistery these days.
That wind goes right to the bone....

Here are some holiday goodies I have been working on...
Most people just LOVE chocolate covered pretzels. They are so easy to make!
I used almond bark (vanilla or chocolate) and the pretzel rods for these yummies.
The secret to almond bark is to cook it very, very slowly, on LOW heat! (You can also microwave it but I haven't tried that for a big batch yet.)
I break it into smaller chunks and start the cooking!
Remember-LOW HEAT!

Next, I added peppermint oil, NOT extract, to the melted almond bark. 
It has to be an oil based flavoring or it won't set up.
The next step is to dip away!
You can dip pretzels, cookies, candy canes, brownie bites,
OR
you can dump the melted goop over popcorn, cereal, smaller pretzels, candy etc...

I often go a little crazy with this stuff! ( I have even made purple and gold covered popcorn for a school bake sale) Purple popcorn??? It sold out!

After you dip, then you decorate!
I sprinkled them with crushed peppermint candies and placed them on wax paper to cool.
This batch was chocolate with creme de menthe bits! YUMMY!
I sprinkle some on the wax paper before I lay the next ones down to get some on the "backside"
All individually packaged for gift giving!
Each brown bag contained 4 different flavors.


Out the door to deliver my goodies...

Thank you Stephanie for the quote!
 The cute heart stamps are from a new set of PTI stamps! 
I may have a new favorite stamp set!

I also have been working on paper and ribbon roses! So easy to make...

December 9, 2010

Band Aid Tin


Welcome Kathy, what nice comments you leave!

Here is a quick post featuring a cute and easy gift card holder.


I covered the tin with patterned paper using double sided stick tape.
Then I added a strip of torn edge green cardstock. The text is a rub-on, 
I don't remember who makes it.
Next up comes a strip of green ribbon added to give the tin a bit more texture.
I then added a ponsettia flower with a brad pushed thru the center. 
Stickles gives the sparkle to the flowers.
Lastly, I tied some cute ribbons to the handle.

So cute and easy to do!
Enjoy!!

November 3, 2010

Black, white & red Christmas?


Good evening friends!
I didn't have the time till later to show you what I have been working on...So busy...
Shows are starting very soon!

I was shopping @ Michaels today and these pencils caught my eye. 
They were in the $1 bin of course. 
That's the first place I look! The colors kinda threw me a little! 
Red, black and white for Christmas?
But I got them anyway.
When I got home, I remembered a paper pack I bought last year on clearance,
from Hobby Lobby! 
It was 70% off-what a deal!! I try to never buy things full price, especially crafty things.
Stick with me and you will find the good deals!
And now I have matching papers and a pencil...What to make, what to make?
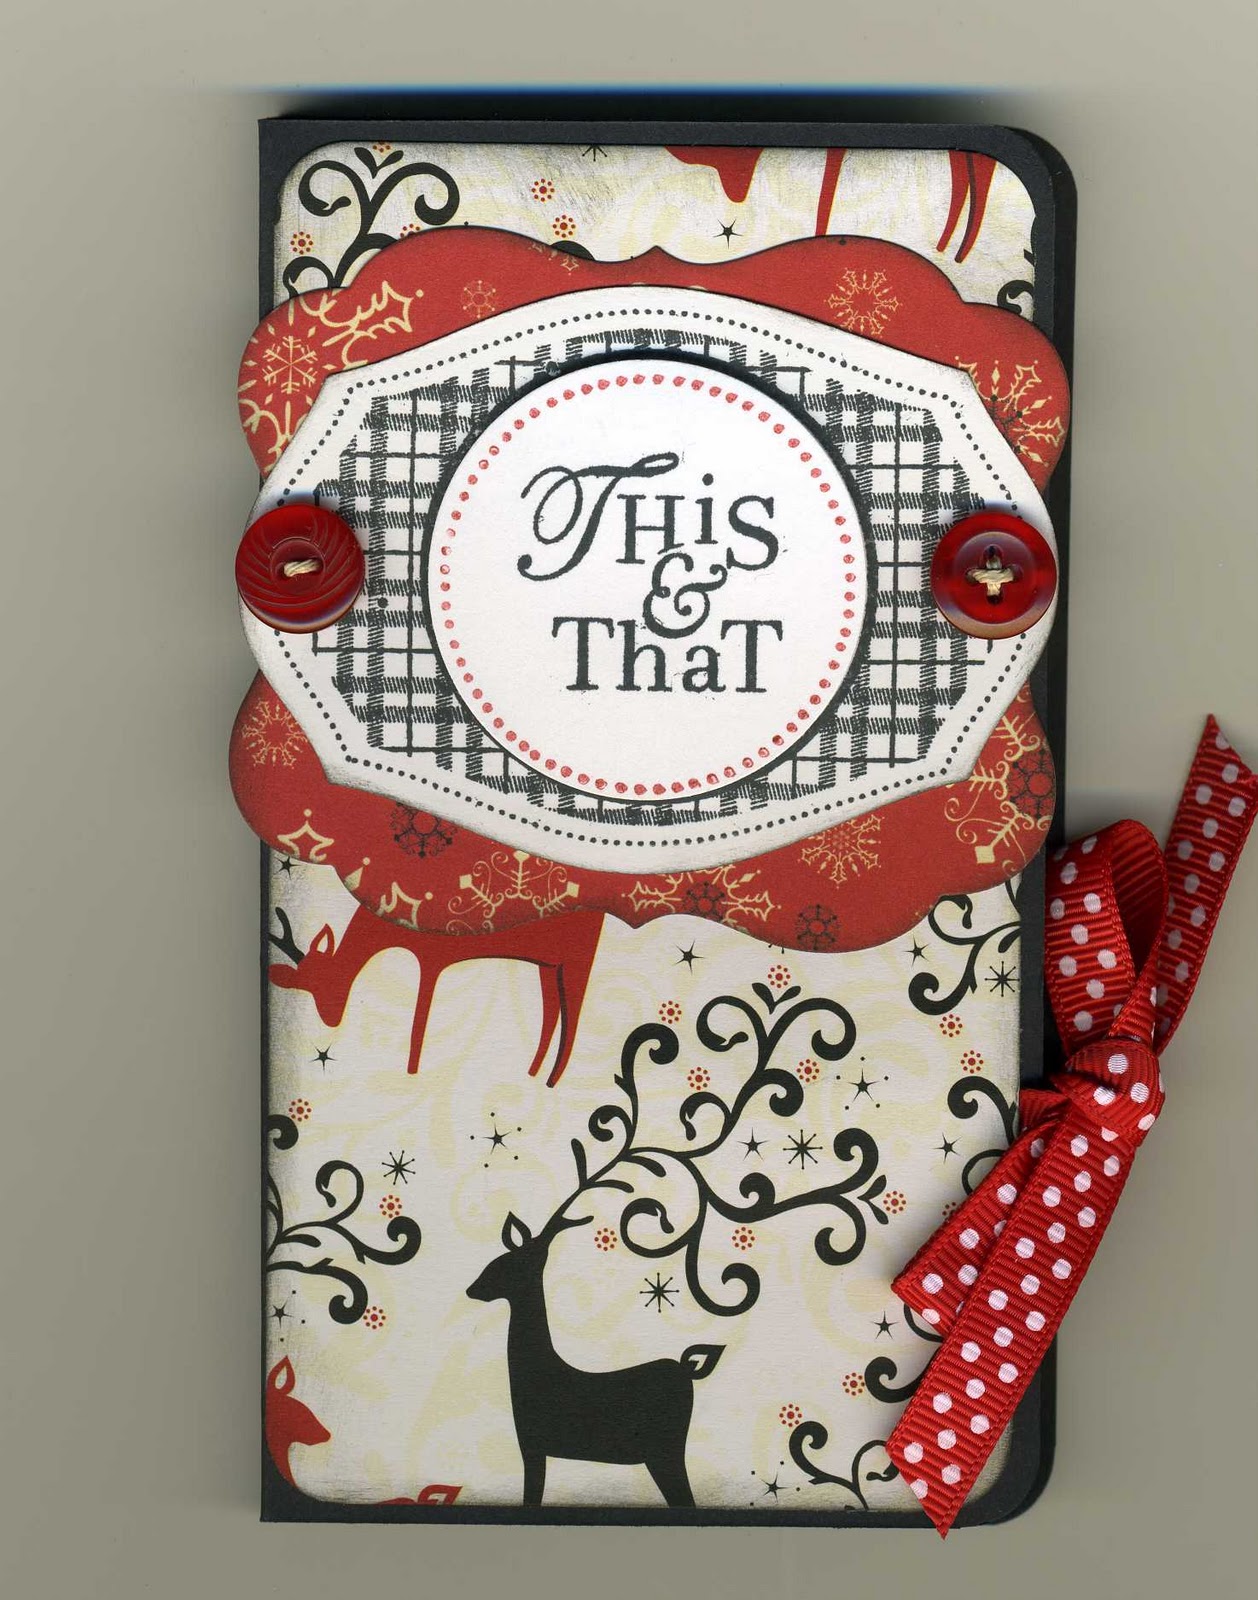
I made scratch paper holders. (I made the post-it notes holders last year so I needed something a bit different.) These were very easy to do and quite cute if I do say so...
This shows the inside of the cover. I plan on putting in a personal note from me in here.
The scratch pad comes from Staples. The cardstock is Bazzill and the papers are from Hobby Lobby.
 This shows the outside of the holder. You can just barely see the score lines.

Here are the measurements that I used:
Refer to the photo for my placements


Cover:  6 3/4" x 5 1/2"    (I rounded the edges)
Score @ 3 1/8" and 3 1/2"   ( I use the Martha Stewart Thingie)
I glued my ribbons using glue dots. I placed one behind the pattern paper on the front 
and one behind the scratch pad on the back.
Pattern Paper for the front cover measures 3" x 5 1/4"

Decorate as you wish...
I made school ones and sport ones and kitchen ones, I can't stop!!
 If you have any questions about this project, just contact me!

Get out the warm blankets-Fall has arrived!!


October 21, 2010

Stocking Stuffers


Business stuff: To have enough inventory for the fairs we craft/create 9 months of the year! You can't make money if you don't have any stuff left to sell. We bring items ranging in price from $75 to $3. Most people don't plan on spending $250 on a 12 x 12 scrapbook BUT they will pay $75 for a smaller pre-made one. You should also carry smaller, lower ($3-$5) priced items, we call them Stocking Stuffers! We normally locate these near the check out stand and we point them out as customers shop or check out. Sometimes for a large order, we throw some in to say thank you for spending your money in our booth!
Onto the stocking stuffers...
These are little glassine bags filled with Stash green teas. Each bag has 2 tea bags, Chia and raspberry  pomagranete. Perfectly colored individual tea bags-evergreen green and holly berry red! The paper topper is a PTI die called mat stack 4. I simply folded it in half and glued it to the top of the glassine sack.
 The sentiment stamp is from a set I got @ Hobby Lobby. The tea cup stamp (and matching die) is also from PTI. The small buttons are from my button stash and it is threaded with white waxed thread. The wax makes it easier to thread through the small holes, and to 
handle with my sore hands...
I used pop dots to "POP" the tea cup off the topper. Then I tucked the sentiment flag behind.
I think these are soooo cute. Who wouldn't appreciate this little bit of love given to them?...
Related Posts Plugin for WordPress, Blogger...